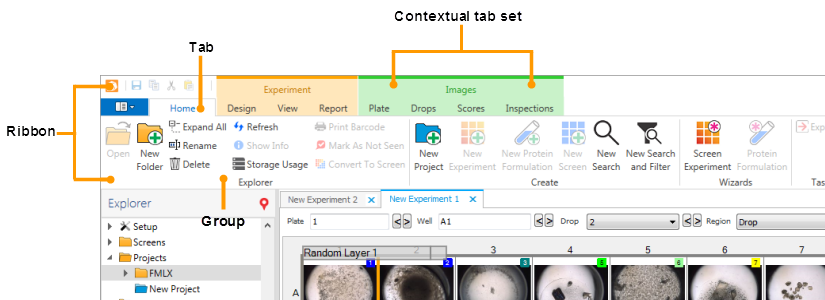
Rock Maker's work environment is divided into two major panes, a ribbon menu, and a View bar.
The top pane of Rock Maker is the Ribbon. It is the strip of buttons and icons that replace the menus and toolbars found in earlier versions of Rock Maker. Each ribbon contains groups of command buttons with common purpose. Learn more about the different ribbon menus.

Ribbon menu
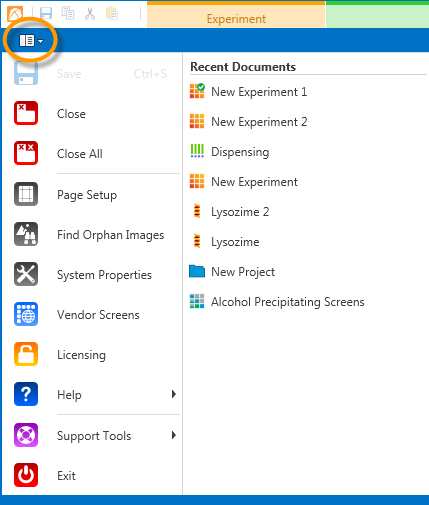
The application button is at the top-left of the software under the Rock Maker icon. If you click the application button, you'll see the Save and Close commands, as well as a list of tools commonly used by administrators, and a list of recent documents.

The Application button
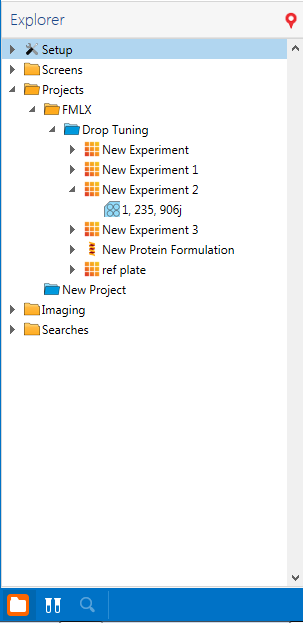
The left pane is the Explorer. When you launch Rock Maker, the Explorer tab displays by default. The Explorer displays all of your experiments, protein formulations, and projects, as well as the Setup and Imaging controls and a special node for Search and Filter.
You can also change the Explorer tab into the Ingredients tab by clicking in the Ingredients button  in the View Bar. To make it easier for you to find the opened experiment from your projects or experiment list, you can now click the Find Opened Experiment button
  .
.

Explorer panel
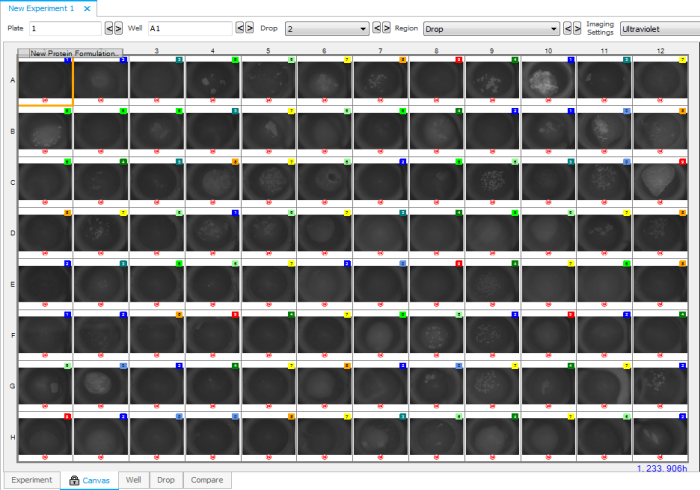
The center panel is the Workspace, where you create screens, design experiments, view imaged plates and so on.
For more information, see The Canvas.
The Workspace is divided into a collection of tabs, each of which contains different information related to an experiment, screen or other document.

Workspace
The bottom of your screen displays the View Bar. It consists of buttons that display the Explorer/Ingredient column, Search panel, Design View, Images View, Ingredient View, Score View, Find Drops, Navigator, Plate Note and a zoom slider.

View Bar